环形布局的定义
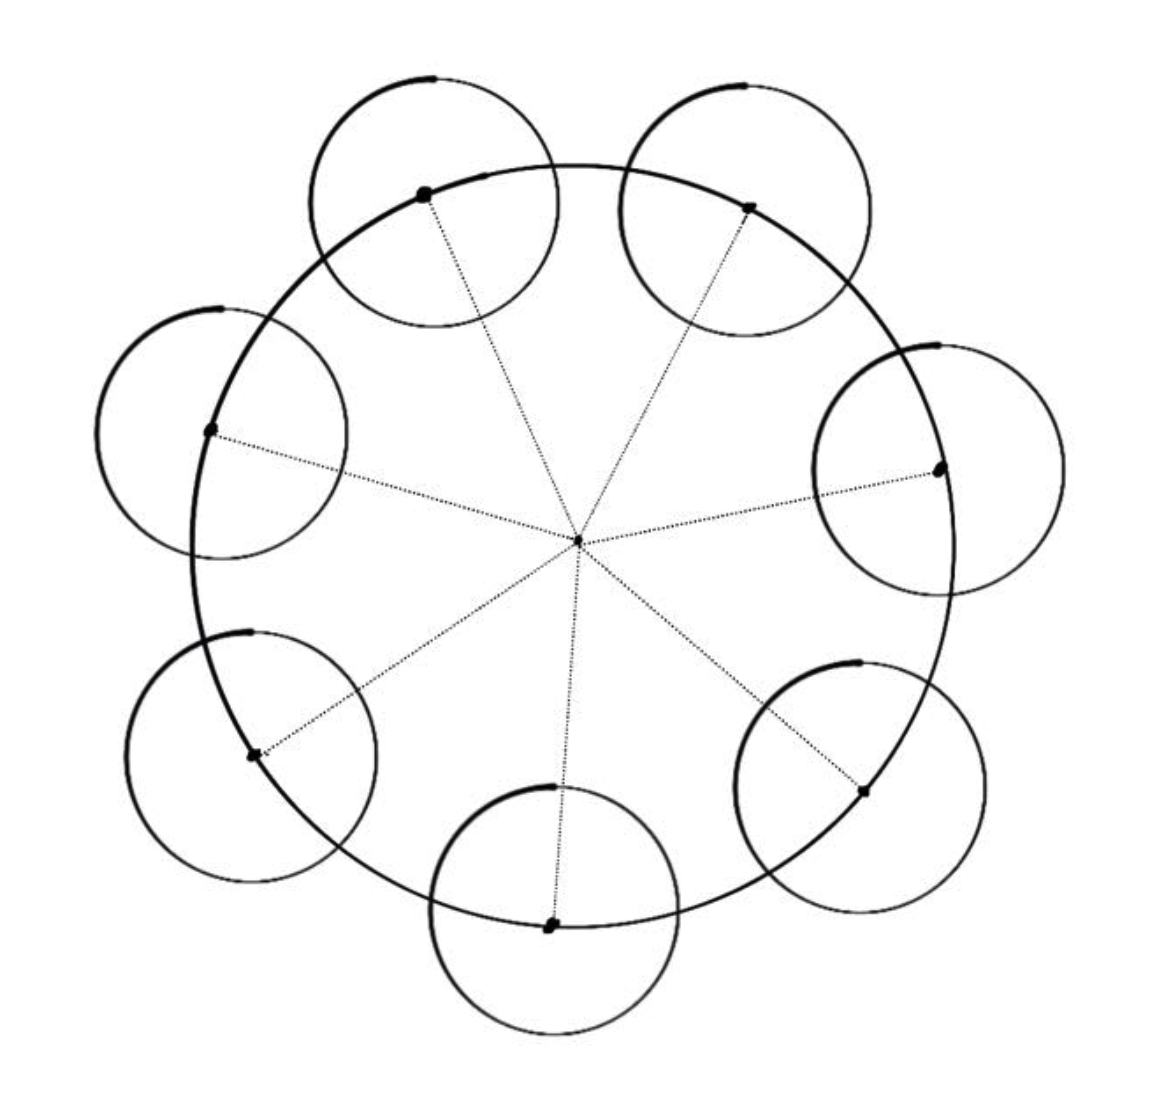
如果存在一个圆 A 和若干个圆 a,圆 a 皆于圆 A 相交,圆 a 的圆心皆位于圆 A 上,且圆 a 间的 圆心距 相等。
即环形布局应当满足以下两个属性:
- 子 widget的中点到容器圆心的距离保持一致。
- 相邻子 widget 中点的间距保持一致。
根据以上性质我们可以根据数学公式计算出 圆 a 相对于圆 A 的位置 ,这是实现环形布局的关键信息。
在上面的定义中并未提及圆 a 的半径关系,实际上圆 a 的半径是可以不一致的,把圆 a 看作子元素的 外切圆,在复杂的生产环境中子元素的外切圆半径往往是不一致的,所以我们还需要确定 圆 a 的最大半径 。
计算子元素的位置
数学推导
要确定圆 a 相对于圆 A 的位置,首先要计算 圆心 a 相对于圆心 A 的偏移量。
设圆心 A 坐标为 $ (x_0, y_0) $ 、半径为 $ r $、圆心 a 坐标为 $ (x_1, y_1) $ ,圆心 A 和圆心 a 的连线和坐标系横轴的夹角角度为 $ \theta $ 。
圆心 a 坐标 $ (x_1, y_1) $ 为圆心 A 坐标 $ (x_0, y_0) $ 加上相对坐标系轴上的偏移量。
$$
x_1 = x_0 + r \times cos(\theta)
$$
$$
y_1 = y_0 + r \times sin(\theta)
$$
代码实现
 1
 2
 3
 4
 5
 6
 7
 8
 9
10
11
12
13
14
15
16
17
18
19
20
21
22
23
24
|
/// 计算圆心a相对于圆心A的偏移量
///
/// @param centerPoint 圆心A的坐标
/// @param radius 圆A的半径
/// @param count 圆a的数量
/// @param which 圆a的序号
/// @param initAngle 起始位置
/// @param direction 排列方向
Offset _getChildCenterOffset({
  Offset circleCenter,
  double radius,
  int count,
  int which,
  double firstAngle,
  int direction,
}) {
  // 扇形弧度
  double radian = _radian(360 / count);
  // 处理起始位置偏移和排列方向
  double radianOffset = _radian(firstAngle * direction);
  double x = circleCenter.dx + radius * cos(radian * which + radianOffset);
  double y = circleCenter.dy + radius * sin(radian * which + radianOffset);
  return Offset(x, y);
}
|
计算子元素的半径
数学推导
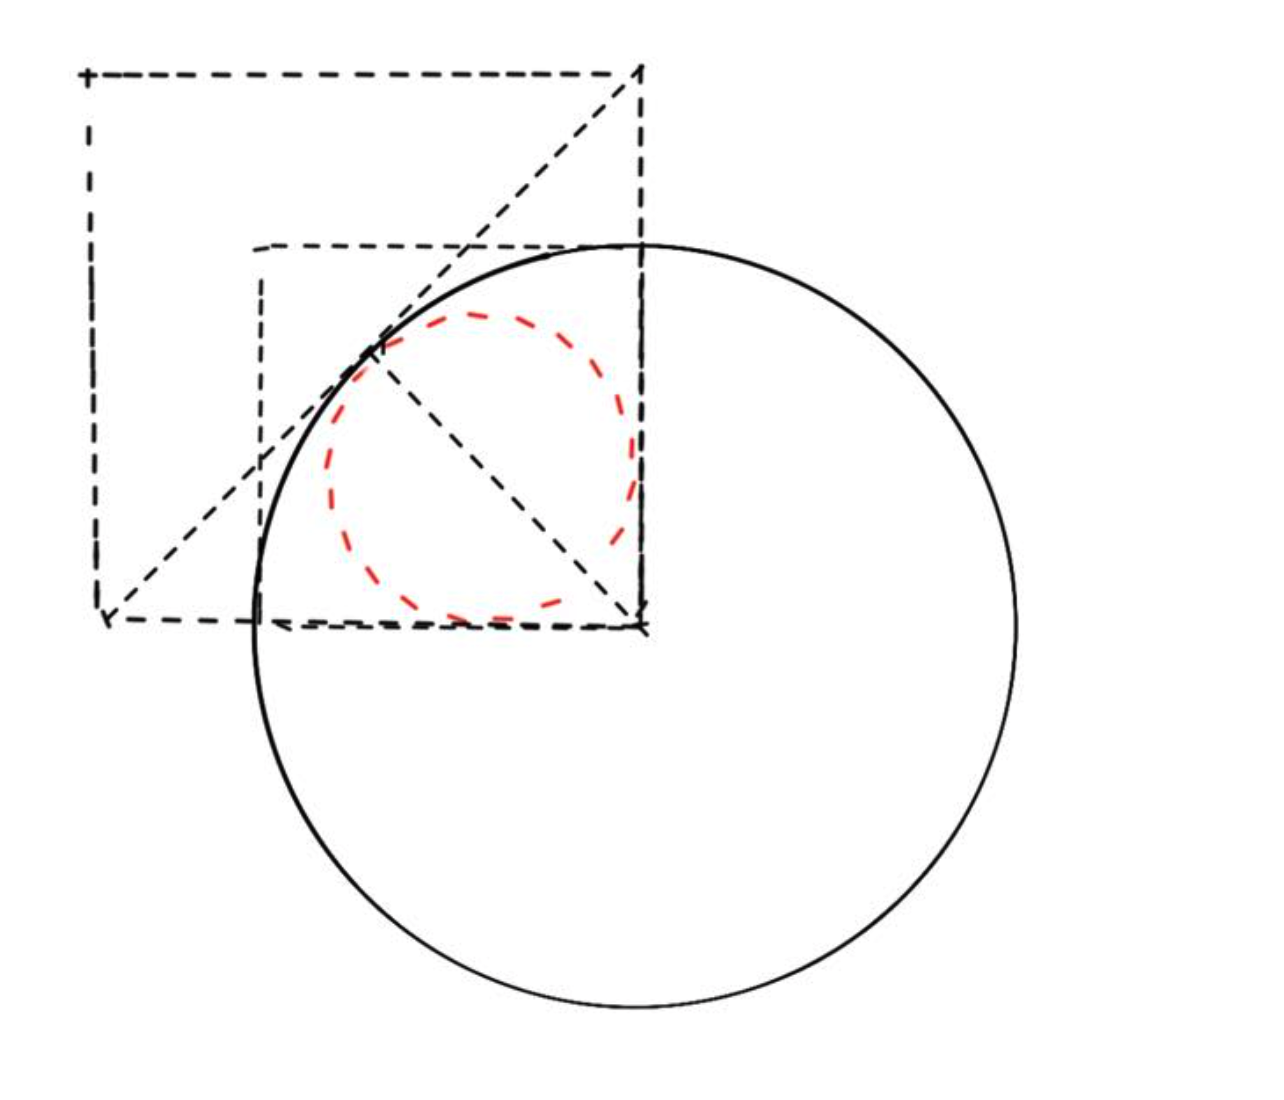
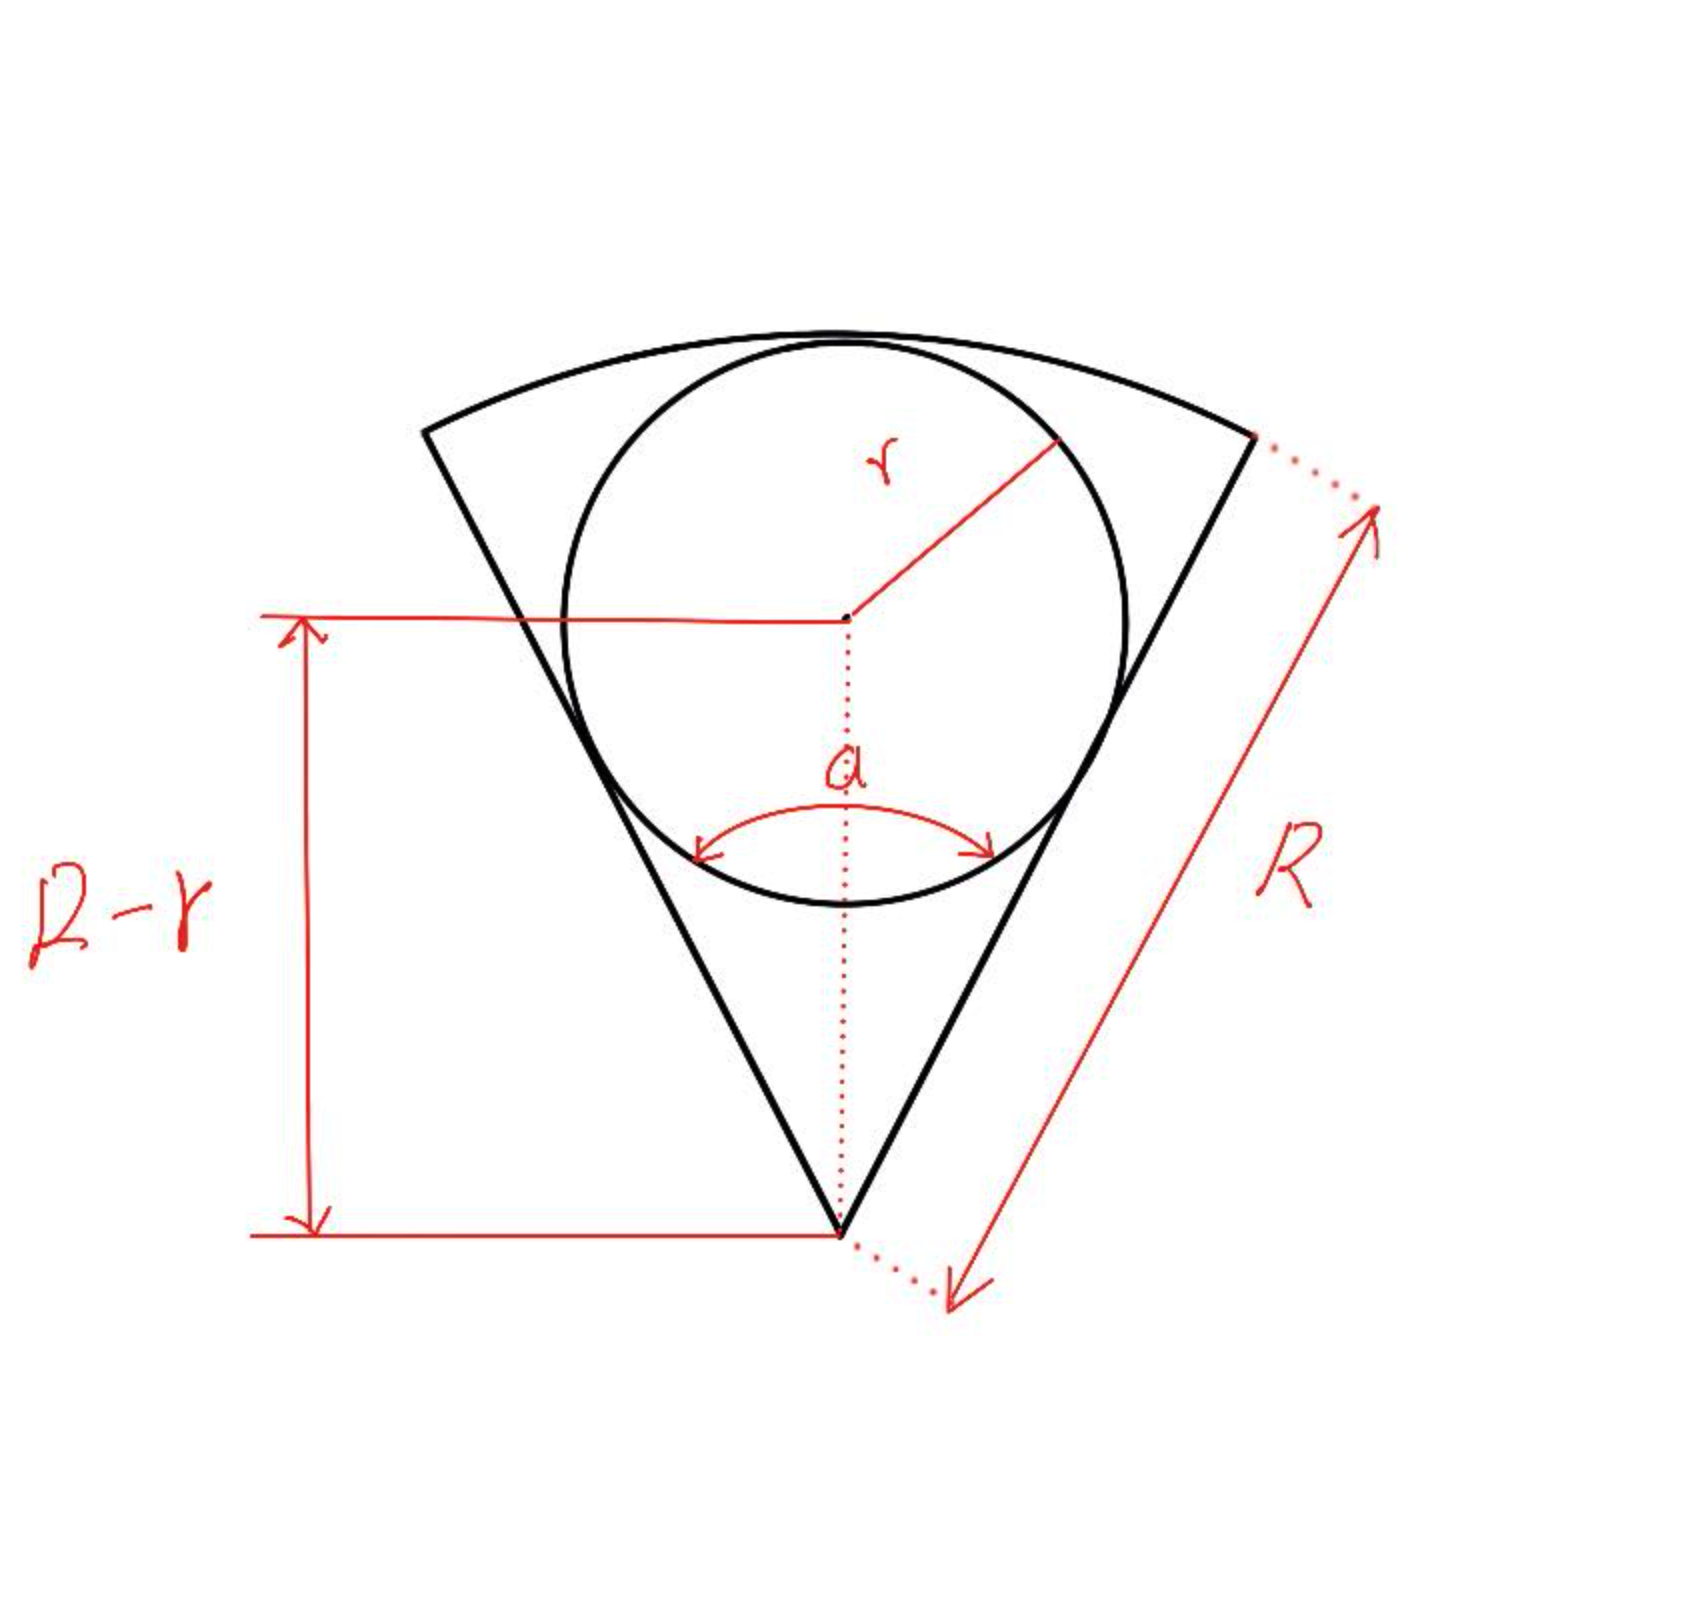
为了满足子元素环形排列的需要,最大子元素的外切圆上限需为 $ 90^\circ $ 扇形的 内切圆,如下图所示。
设扇形半径为 $ R $、扇形圆心角为 $ \alpha $、扇形内切圆半径为 $ r $。
最大子元素半径推导过程如下。
$$
sin(\frac{\alpha}{2}) = \frac{r}{R - r}
$$
$$
r = (R - r) \times sin(\frac{\alpha}{2})
$$
$$
r = R \times sin(\frac{\alpha}{2}) - r \times sin(\frac{\alpha}{2})
$$
$$
r + r \times sin(\frac{\alpha}{2}) = R \times sin(\frac{\alpha}{2})
$$
$$
r = \frac{R \times sin(\frac{\alpha}{2})}{1 + sin(\frac{\alpha}{2})}
$$
代码实现
 1
 2
 3
 4
 5
 6
 7
 8
 9
10
11
12
13
14
15
16
17
18
19
20
|
/// 计算圆a的半径
///
/// @param radius 圆A的半径
/// @param angle 扇形的角度
double _getChildRadius(double radius, double angle) {
  // 扇形角度大于180度,只可以放置一个。
  if (angle > 180) {
    return radius;
  }

  /// 扇形最大内切圆公式,见公式推导。
  return radius * sin(_radian(angle / 2)) / (1 + sin(_radian(angle / 2)));
}

/// 计算弧度
///
/// @param angle 角度
double _radian(double angle) {
  return pi / 180 * angle;
}
|
实现
我们选择使用 CustomMultiChildLayout 实现环形布局的功能,看下官网的定义。

“ CustomMultiChildLayout is appropriate when there are complex relationships between the size and positioning of multiple widgets. ”
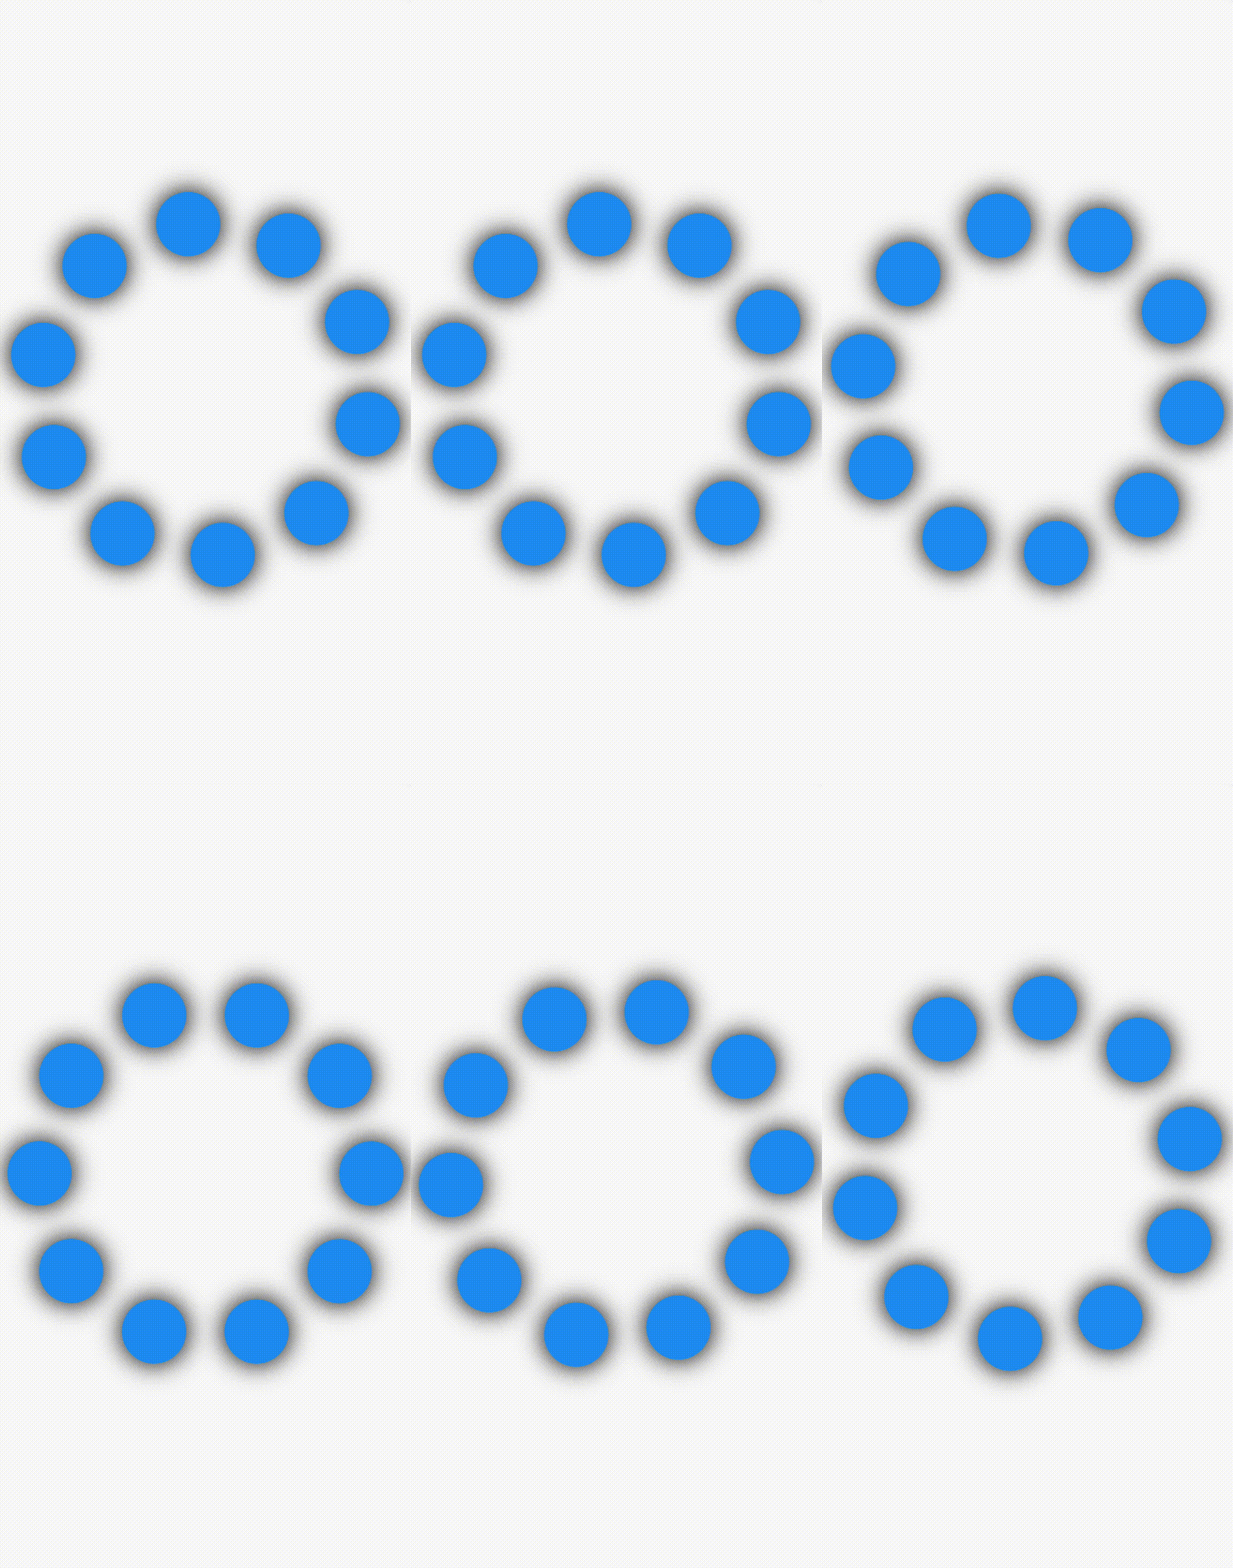
所以用 CustomMultiChildLayout 实现再合适不过,效果如下。
完整代码已上传至 pub.dev,这里仅截取 RingLayout 的部分代码。
ring_layout: https://pub.dev/packages/ring_layout
 1
 2
 3
 4
 5
 6
 7
 8
 9
10
11
12
13
14
15
16
17
18
19
20
21
22
23
24
25
26
27
28
29
30
31
|
class RingLayout extends StatelessWidget {
  final List<Widget> children;
  final double initAngle;
  final bool reverse;
  final double radiusRatio;

  const RingLayout({
    Key? key,
    required this.children,
    this.reverse = false,
    this.radiusRatio = 1.0,
    this.initAngle = 0,
  })  : assert(0.0 <= radiusRatio && radiusRatio <= 1.0),
        assert(0 <= initAngle && initAngle <= 360),
        super(key: key);

  @override
  Widget build(BuildContext context) {
    return CustomMultiChildLayout(
      delegate: _RingDelegate(
          count: children.length,
          initAngle: initAngle,
          reverse: reverse,
          radiusRatio: radiusRatio),
      children: [
        for (int i = 0; i < children.length; i++)
          LayoutId(id: i, child: children[i])
      ],
    );
  }
}
|


